I was honored to be asked to post a class for All Moments Remembered (AMR). My class went up yesterday. :) I'm glad people are liking it. Here is what I posted...
(you can click on any of the photos to view them bigger)
I like to work with canvases. I love incorporating papers and embellishments on to my canvas to create a work of art. Something that is fun to do is to create a scene. This Christmas I made a Christmas canvas to hang, now I have done one for Spring. I will most likely do a canvas for each season and then just swap them out throughout the year. J
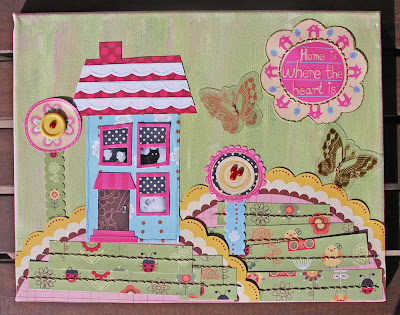
Here’s what the final project looks like:


I’ll break it down in several steps for you.
I started with an 11 x 14 canvas. Of course, you can use any size though.
PAINTING
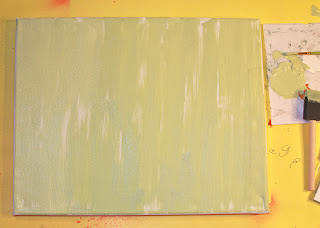
My fist step was to paint it. I like to include at least two colors on my canvas. In this case I choose green and pink. I also used a glitter paint. J Gotta love that glitter. I just painted with vertical strokes. I don’t worry about getting it all covered well. I use acrylic paint, and I love Making Memories paints.
I started with the green: 
Then I added a little bit of pink.
Remember if you add too much of a second color, you can always paint over it again with the first color. That is the beauty of working with paint.
Then I added some glitter. This picture is VERY glittery, it doesn’t look like this much in real life. J
Then I started playing with my patterned papers. I kept my concept a little bit quirky and didn’t worry about things being perfect.
MY HILLS
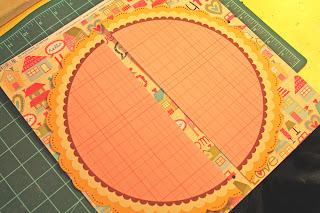
I took a piece of paper from My Little Shoebox that was shaped in a scalloped circle. I cut it in two.

I wanted something fun and unique for the hills, so I cut strips of another piece of paper and layered them on my scalloped circle pieces. I poked holes through each one with my paper piercer so I could stitch through the strips.
I actually stitched through these before I adhered them to the canvas. I then positioned and adhered them to the canvas and cut off the excess.
ADHESIVE
Now there are SO many kinds of adhesive out there. And many types will work on paper and canvas. I have tried my regular Tombow Mono Adhesive, but that will end up having the paper come off the canvas. I use Mod Podge on my altered items but have not tried it on canvas so I cannot tell you how well it works, but I imagine that it would work fine too. What I use, simply because I used it once and know it works well with this kind of project, is that double sided red tape. You can buy it in a lot of different places from several different brands. They all seem to work the same. You just peel off the red backing and you have a secure double-sided tape.
MY HOUSE
I was looking through my paper that I was using and was very inspired by a house on a specific piece of patterned paper and decided to make my house like it. (Paper by My Little Shoebox)
So, using my exacto knife, I cut pieces of patterned paper to piece together to make my house. I cut my rectangle for the house and my roof. I did this simply by eyeing my design as I cut. Like the rest of my project, they are not perfect…but it is part of it’s originality. You could always create your design on the computer and print it out to use as a guide as you cut your pieces. Then I cut my little windows. I cut rectangles and then just cut the inside parts out leaving a line through the middle like a window.
I wanted to add a piece of me on my canvas. I always do this, usually I either add little photos (through windows, in the center of flowers, etc.) or I include something to represent each person in our family (like my fall family portrait). This time I choose to add some photos in the windows. They are very small. They were about 1” x .75”. I print my own photos at home so this was easy for me to do.
And I really liked how the scalloped lines on the roof from my inspiration piece were, so I added the same. I used white cardstock and my Quickutz Revolution to cut the scalloped borders. However, you could do this with prepackaged borders or simply by using decorative edge scissors. I put them on my roof and the cut off the excess.
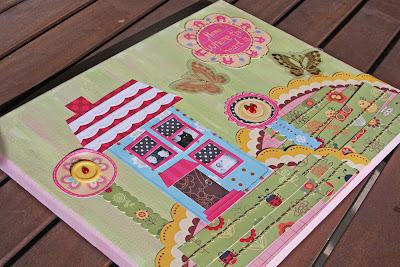
Those are the main pieces of my work. I added various other things, including more paper, gems, buttons, 3D glitter paint and additional stitching, to create my finished look. Note: for the stitching I just stitched through the canvas which is very easy to do. Just remember that you have wood on the back, so it is easier to have stitching where the wood is not. J
And there you have it.
Here are some close-up's:


12 comments:
It was great seeing you over there! As I posted there, this is awesome! I just love it!
that is so stinkin' cool! love every little bit of it! :)
This is really an adorable creation and it is fun you shared the steps.
Wow, You are so talented. The canvas is fantastic. Thank you so much for sharing....epecially for the step-by-step.
Wow, you are amazingly talented! I love that orange circle tape, that's the best!
Whoohoo Pamela!! I love canvas art too and I am teaching a class this coming Thursday....I adore what you did here, total cuteness! *STAMPIN HUGS* Alex
This is a really cute idea ~ went back and looked at your other canvases, too ~ so cute! :)
Ok, wow! You have to submit this to the My Little Shoebox call for designers! It is just awesome! I love it!
Beautiful project and how neat to be asked to post the class?! Congrats on that :)
Wow, what a great project and awesome tutorial to go with it!!! Loving all of it ♥ Fantastic work. TFS
This is fabulous, Pamela! Love it so much!
I saw this over at 2Peas and was blown away - LOVE it!!! :) Thank you for sharing your process - I am going to try to make one too! :)
Post a Comment